

This feature isn’t available on every plan; if yours doesn’t include it, you’ll be prompted to upgrade.
Change the font
1
Select a slide
In the AhaSlides editor, select any of the slides in your presentation.
2
Open the Design tab
Head to the right-column, select the Design tab, and scroll down to Text.
3
Choose your font
Use the dropdown menu to select your desired font.
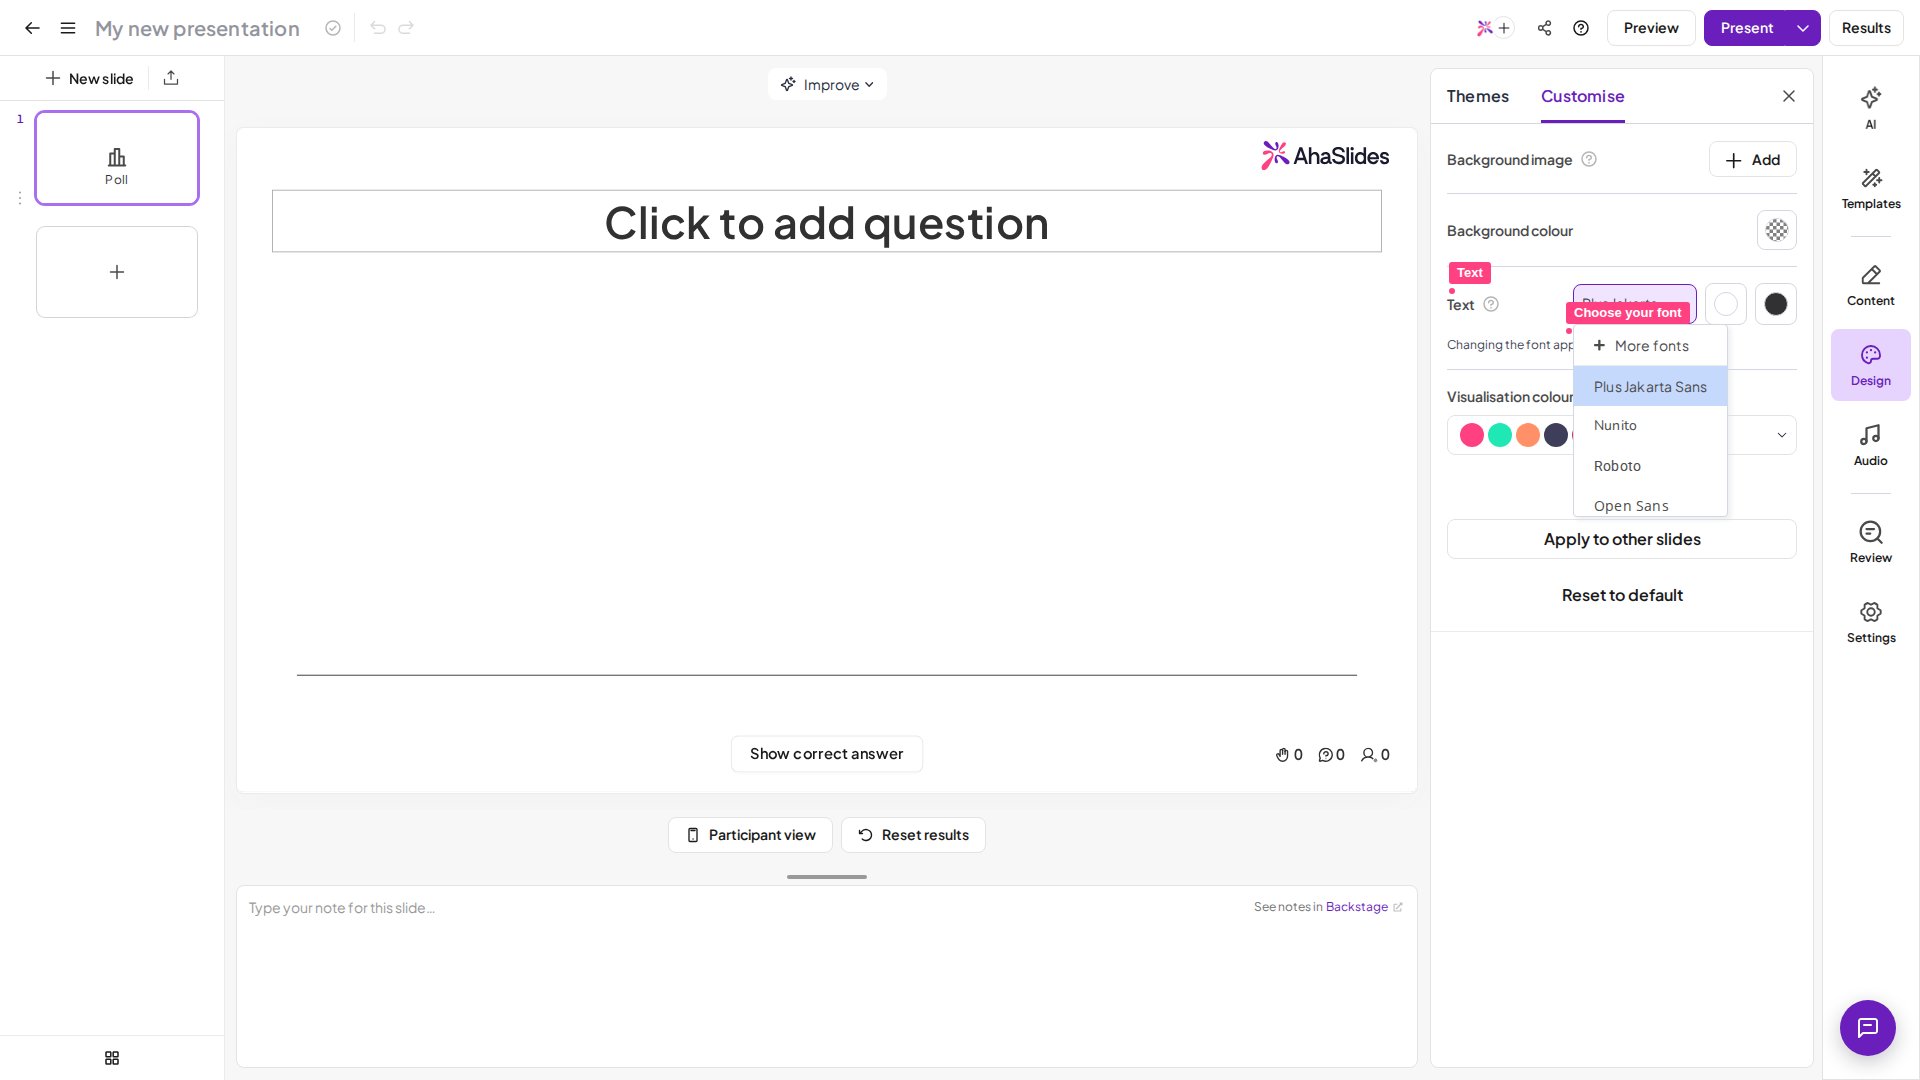
This changes the font across your entire presentation. It will also be visible on your audience’s screens. Choosing a font isn’t available on every plan; if yours doesn’t include it, you’ll be prompted to upgrade when you pick one.
Manage your fonts
The font library isn’t available on every plan either; if yours doesn’t include it, you’ll be prompted to upgrade.
1
Open the font library
Click on the dropdown menu under Text in the Design tab of a slide, then click the More fonts option at the top. This opens the font library.
2
Select your fonts
Choose from a larger bank of 250 fonts to build your own selection of preferred fonts. For any font you’d like to be able to use, check the checkbox next to the font name — this adds it to the My fonts column on the right.
3
Confirm your selection
Once you’ve finished selecting your fonts, click Done. Those fonts are now available in the Text dropdown menu.
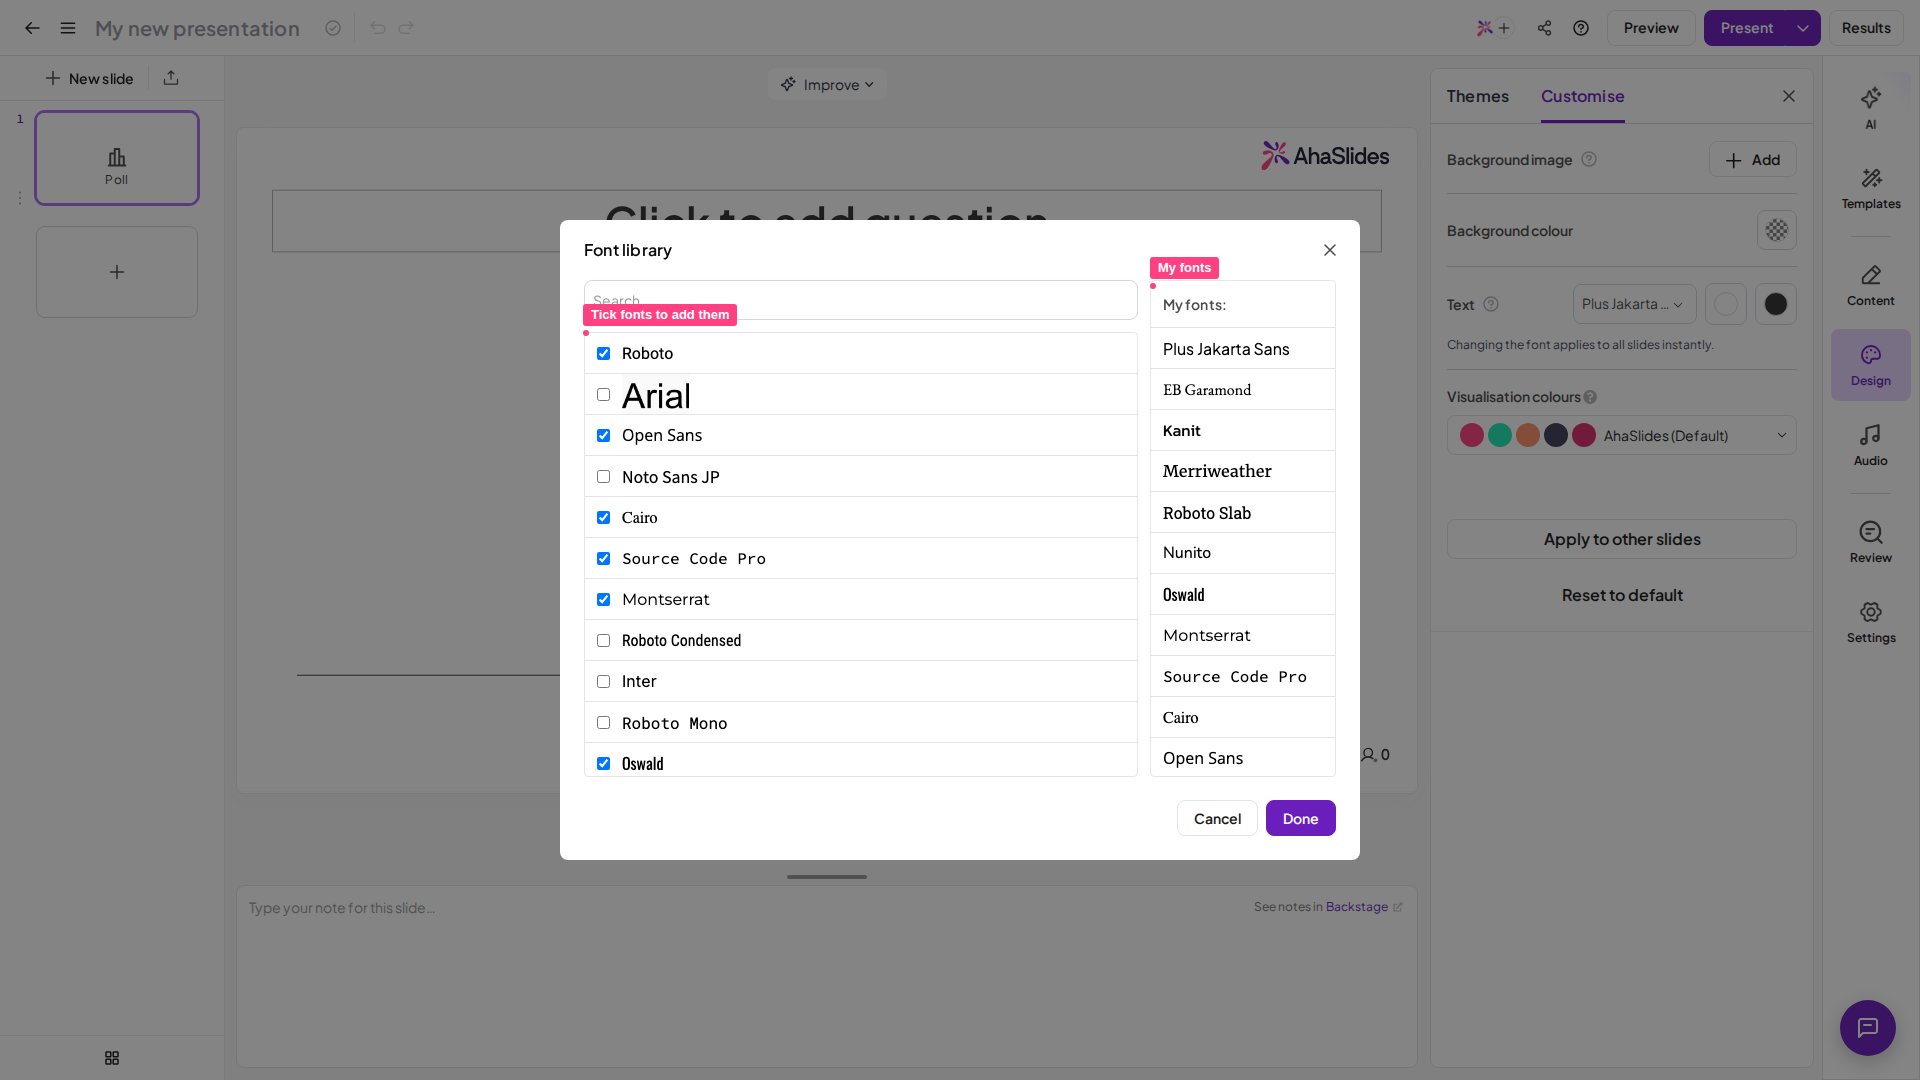
Once you have selected your fonts from the font library, those fonts become your immediate options across all presentations in your account.
Fonts on the Content slide
The Content slide has its own small font library, which is displayed in the top left corner of the editor when editing text. However, it is still possible to change to a font in your font library by selecting the Design tab and finding your preferred font in the Text dropdown menu.It is currently not possible to import fonts to AhaSlides.