Creating a new presentation or survey
1
Open My Files
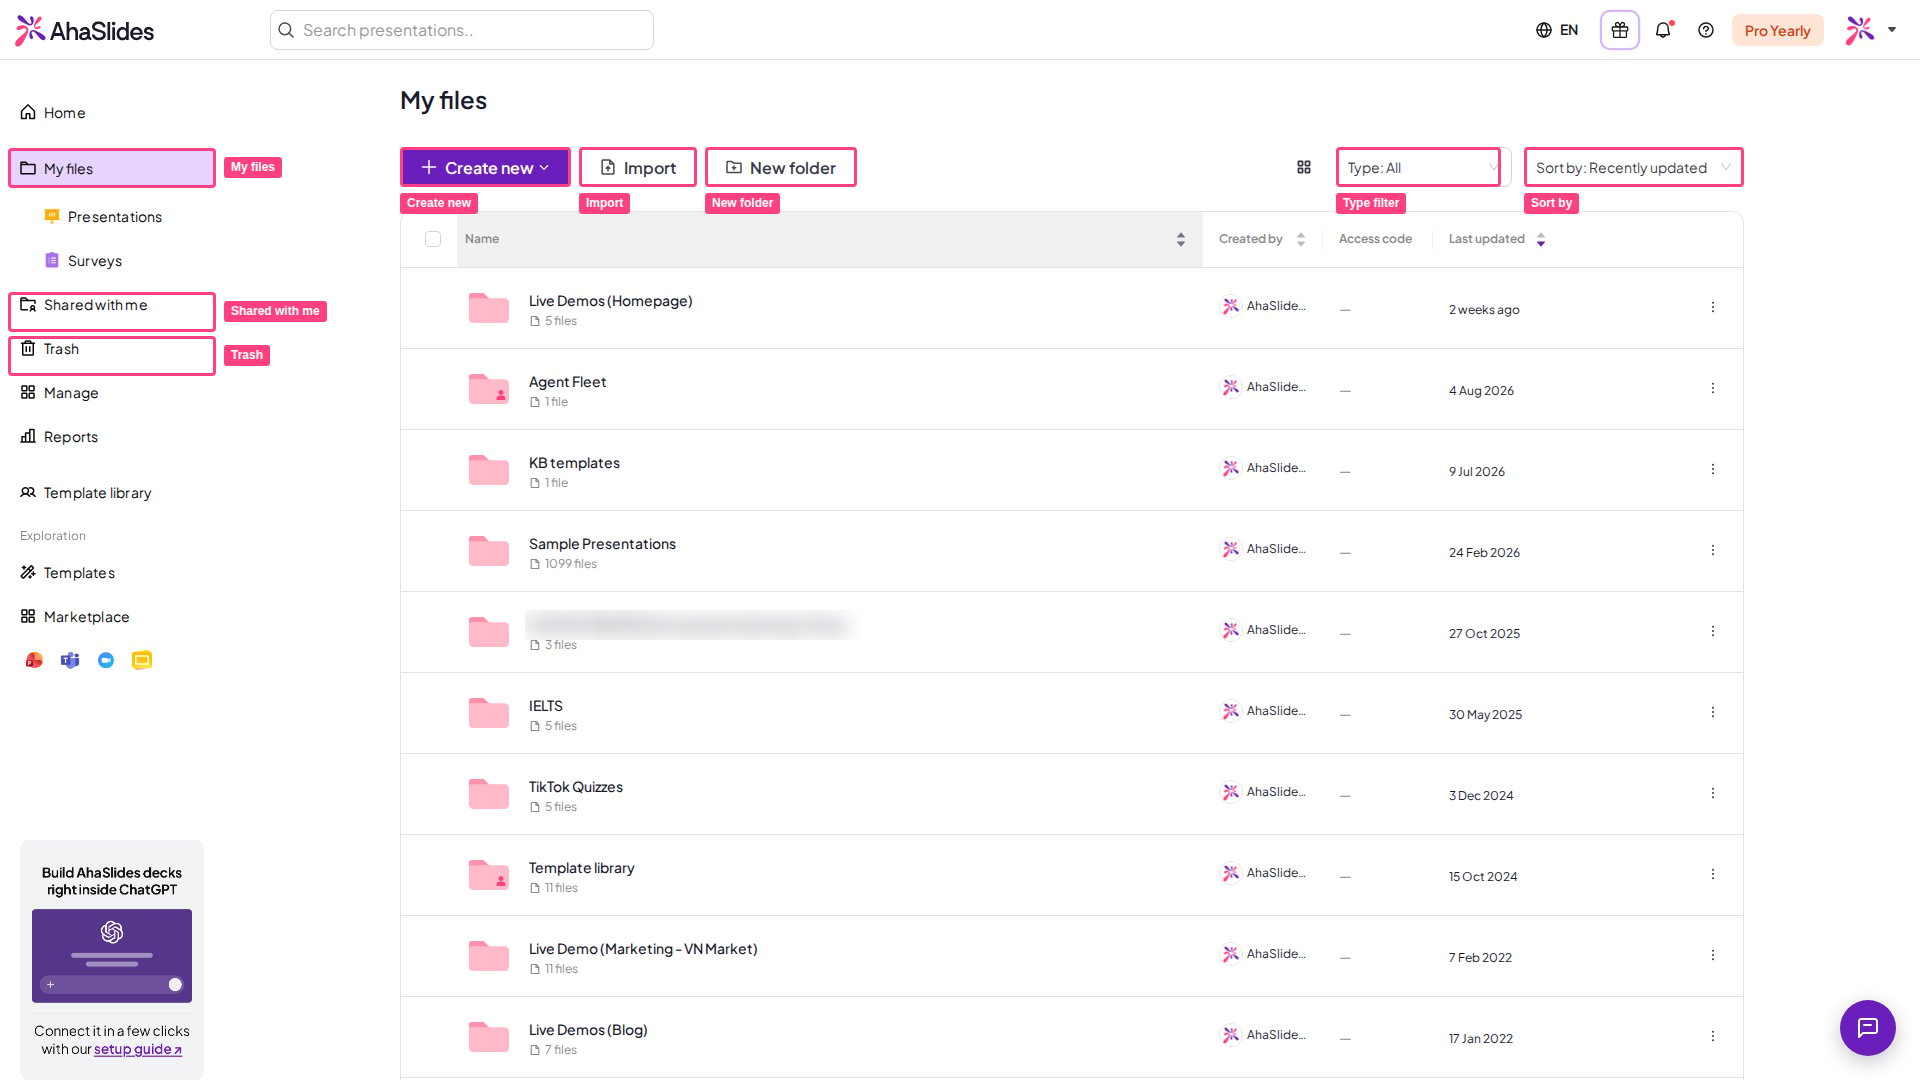
Click My Files in the left sidebar.
2
Click Create new
Click Create new at the top of the page and choose Presentation or Survey. If you are in the Presentations or Surveys view, the button reads New presentation or New survey instead.
3
Start editing
The new presentation or survey opens in the editor. In a presentation, add a slide by clicking New slide at the top of the left-hand slide panel and picking a slide type.
Organising your files into folders
1
Create the folder
In the My Files view, click New folder, give it a name and click Create Folder.
2
Select what to move
Select the presentations or surveys you want to move (see Bulk actions below).
3
Move them in
Click Move to and choose your folder.
Each folder can contain up to 200 presentations. Sub-folders are supported up to 10 levels deep.
Browsing your files
- Type — In the My Files view, filter the list to All, Presentations or Surveys.
- Sort by — Order the list by edit time (Recently edited or Earliest (edit time)), creation time (Recently created or Earliest (creation time)) or name (Alphabetical or Alphabetical (reversed)). In Shared with me and shared folders, the edit-time options read Recently updated and Earliest (updated time).
- Grid view / List view — Switch between a list of rows and a grid of thumbnails with the view button next to the sort control.
- Why an old presentation moved up the list — The edit-time sort also counts activity on a presentation, such as presenting it to a live audience or resetting its results, so a presentation you haven’t edited can move to the top. Its Last Edited date only changes when you edit its content.
- Access code — In the list, each presentation’s access code is shown in the Access code column. You can read it there but not edit it; to change a code, open Share and see Changing your URL access code.
Actions on a presentation
Hover over a presentation and click Present to start presenting straight away. Click the ⋮ menu at the end of the row to see all the actions: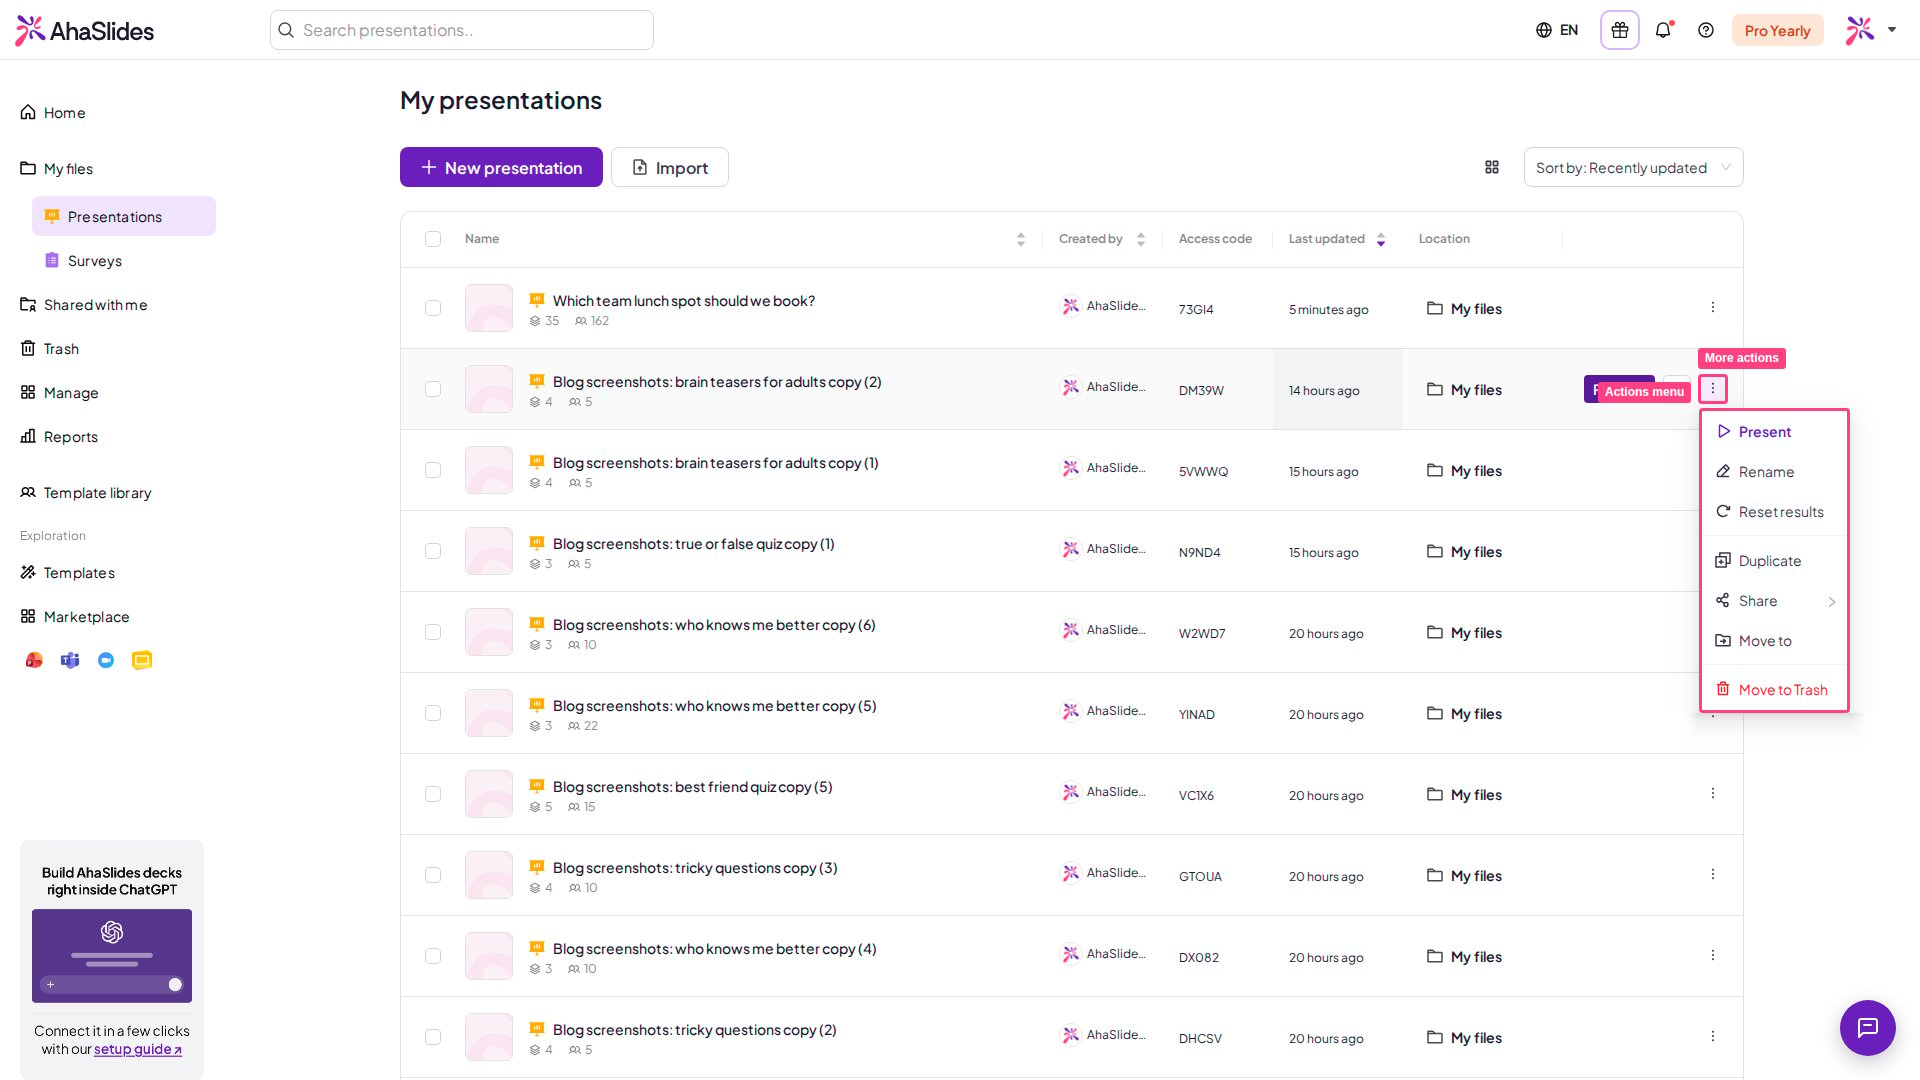
Actions on a folder
Click the ⋮ menu on a folder you own to Rename, Share or Delete it. Deleting a folder permanently deletes its sub-folders and everything inside them, so it can’t be restored from Trash.Bulk actions
1
Select items
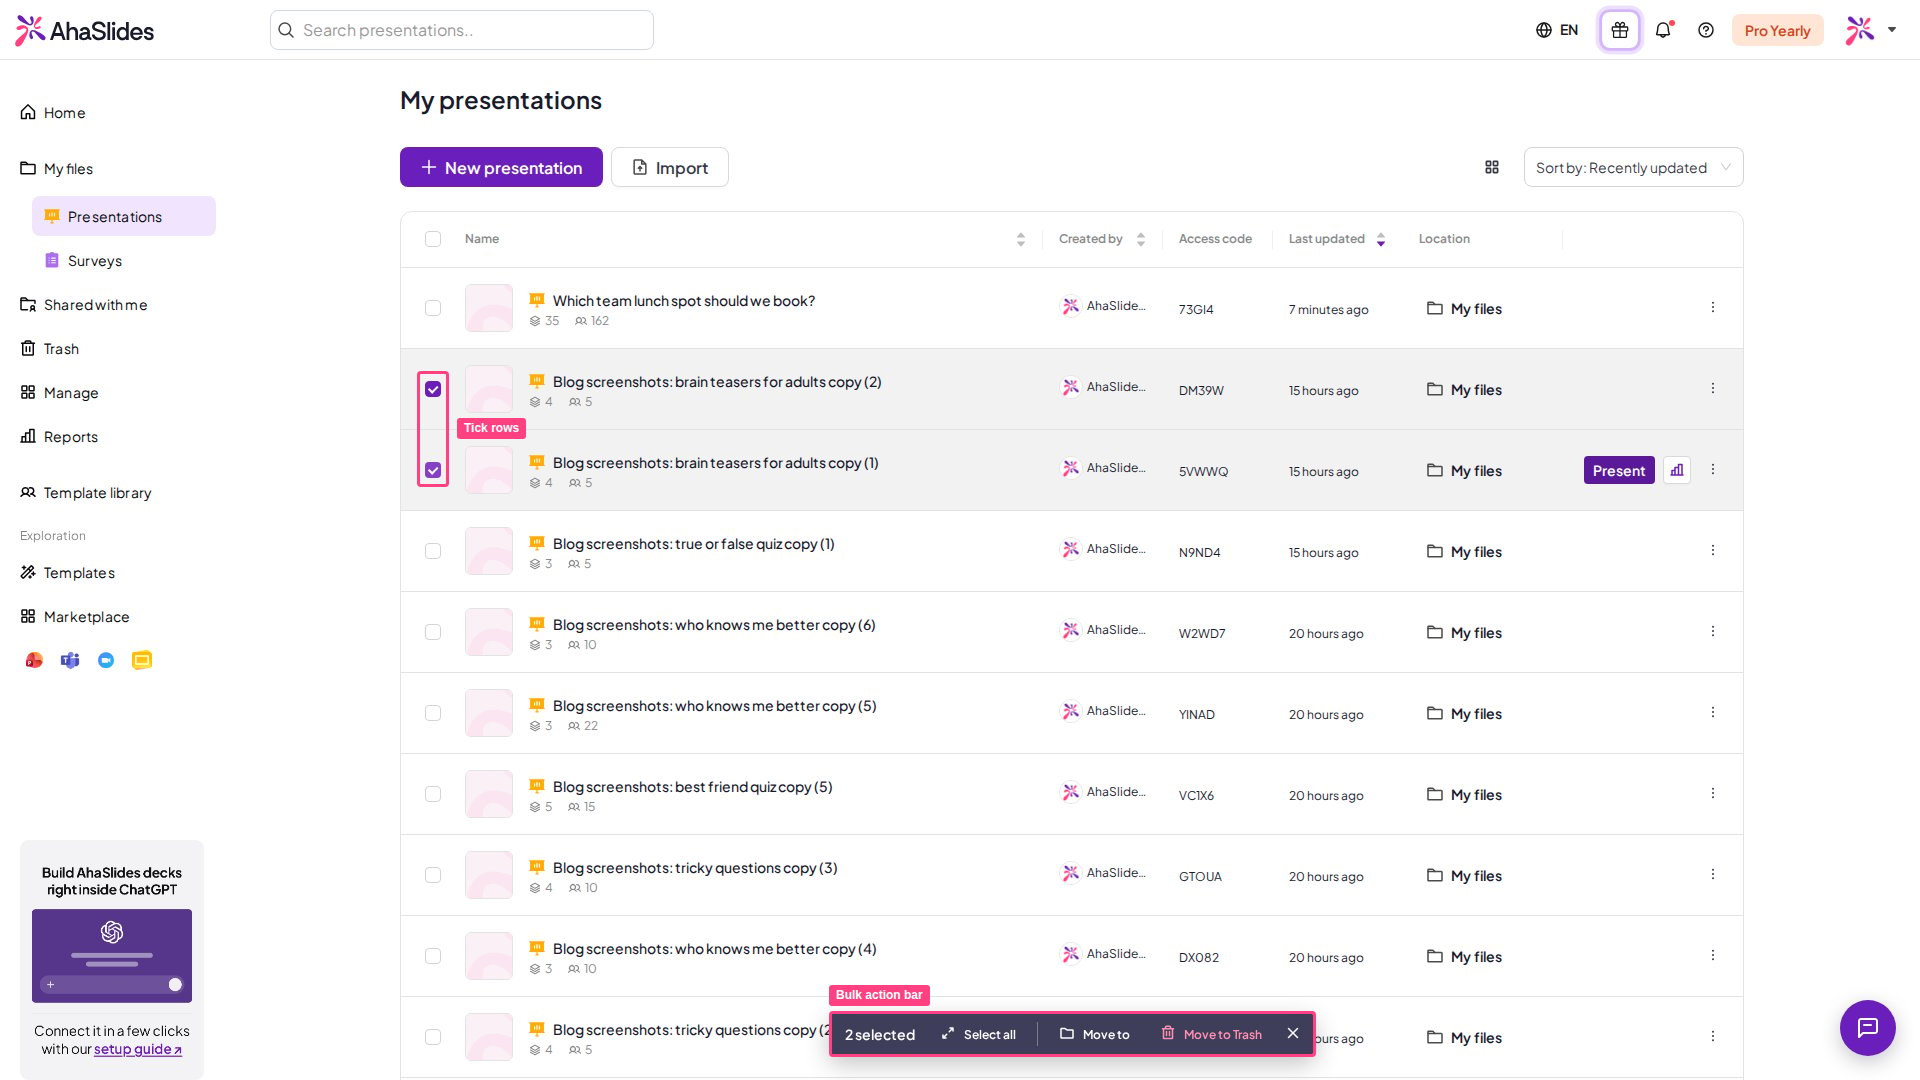
Tick the checkbox on a row. An action bar appears at the bottom of the screen as soon as one item is selected.
2
Select more, or select all
Tick more rows, or click Select all in the action bar.
3
Choose an action
Choose Move to to move everything selected into a folder, or Move to Trash to send it all to Trash at once.