

Manage at a glance
Participants and custom fields are shared across your workspace, so one person has one profile however many courses they take.
Open Manage
Click Manage in the left sidebar of your AhaSlides dashboard. You can also get there from a published course: in the course editor, click Share, open Assign to learners, then click Open Manage. Use the Participants and Custom fields tabs to move between participants and their custom fields.Choose who can open a course
In the Share course panel (the one that shows your learner link), use Who can open this course to pick one of two options.
To choose who is assigned, click Assign to learners in the same panel and pick the participants who get the course. Assigning a course does not send an invitation email. Send the course link to your learners yourself.
Add participants
1
Open Participants
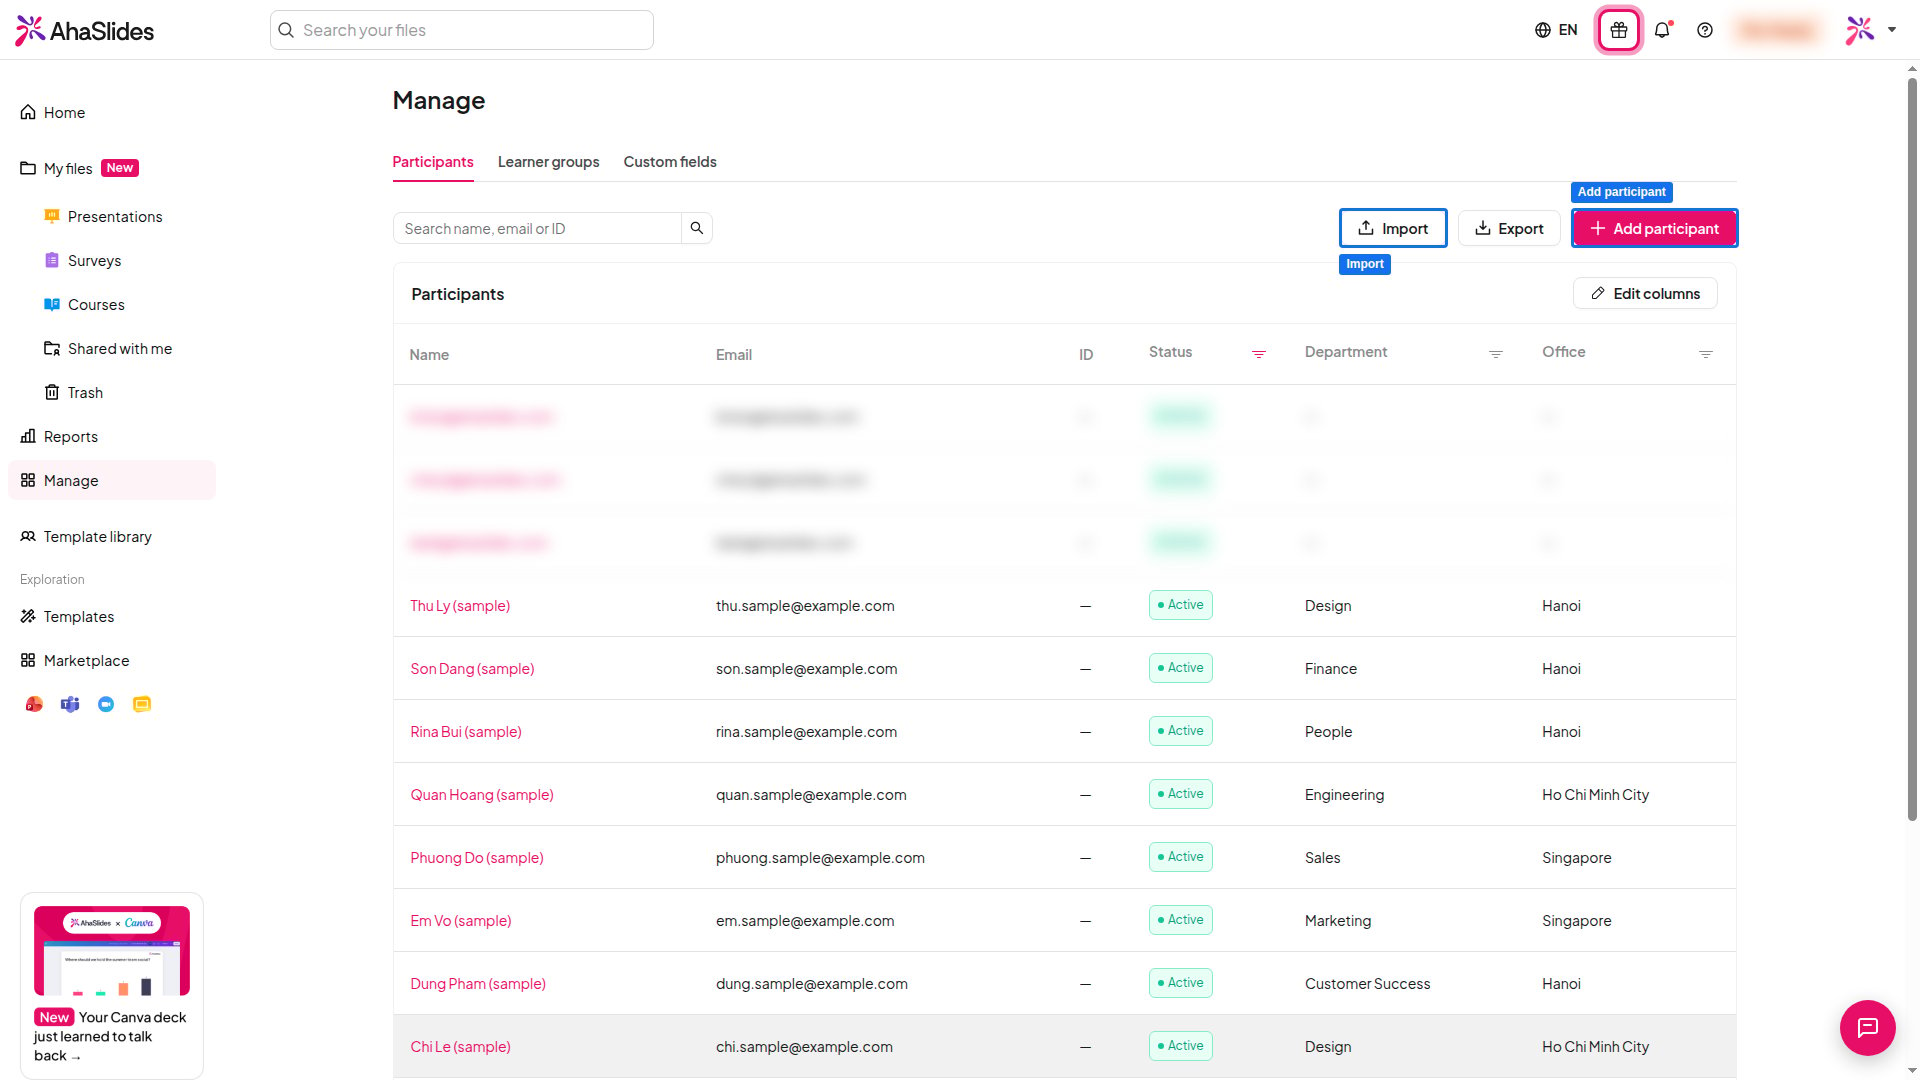
In Manage, open the Participants tab.
2
Add a participant
Click Add participant, then enter an email address, a display name and, if you use one, an external ID such as an employee or student code. Each email address and external ID can belong to one participant only.
3
Fill in custom fields
Complete any custom fields you have created. Fields marked as required must have a value.
Import and export participants with a CSV file
Import many participants at once from a CSV file with a header row. A file can hold up to 1,000 rows and be up to 1 MB.1
Start the import
On the Participants tab, click Import. To start from a ready-made file, click Download CSV template. It includes your current custom fields and an example row to replace.
2
Upload your file
Click Upload file or drag a
.csv file onto the window.3
Check the column mapping
Under Column mapping, check each destination in the Maps to column. Change a match, or map an unfamiliar header to an existing field. One column must map to Email, and each destination can be used only once. To add a field that does not exist yet, choose Create field in the Maps to menu. The field is saved straight away, even if you cancel the import.
4
Import
Fix anything the check flags, then click Import. The import report shows how many participants were created, updated and skipped, with a reason for every skipped row.
YYYY-MM-DD, yes/no values as true or false, numbers with a decimal point, and phone numbers with the country code. For a multi-select field, separate options with ; or |. If a required custom field is not mapped or has a blank cell in any row, Import stays unavailable until you fix it.
To export your participants, click Export on the Participants tab.
View a learner profile
Click a participant to open their profile. It shows their details and custom fields, and the courses they are assigned to, with their progress in each. For a closer look at one course, open the course report.Add custom fields
Custom fields hold extra details about each participant, such as department or position. You can use them in CSV imports. A workspace can have up to 50.- Open the Custom fields tab and click Add field.
- Enter a Label and a Key. The key is the CSV column name, can use lowercase letters, digits and underscores, and cannot be changed later.
- Choose a Type: text, select, multi-select, date, number, yes/no, email, URL or phone. A select or multi-select field needs at least one option.
- Turn on Required if every participant must have a value.
Frequently asked questions
Do learners get an email when I assign them a course?
Do learners get an email when I assign them a course?
No. Assigning a course gives access but does not send an invitation. Share the course link with your learners, who can then follow it as described in Take a course as a learner.
Can a learner see other learners' details?
Can a learner see other learners' details?
No. Learners cannot see another learner’s private data, and only authorised admins can manage their workspace’s participants.
Why can't I import my CSV file?
Why can't I import my CSV file?
Check that the file is a
.csv with a header row, no larger than 1 MB and with no more than 1,000 rows. One column must map to Email, and every required custom field must be mapped and filled in on every row.