

A team plan and an individual plan are 2 different types of plans. A team owner can have their own paid plan, while the team is still under a free plan. The owner can upgrade from an individual plan to a team plan — see Purchasing Multiple Licenses for AhaSlides Team Plan Subscription.
Free Team vs. Team Plan
There are two types of teams:
To purchase or get more licenses for your team plan, see Purchasing Multiple Licenses for AhaSlides Team Plan Subscription.
Creating a Team
1
Open team creation
If you do not yet have a team, click Create your team in the left-hand panel under the Team section.
2
Name your team
Enter a name for your team in the Team name field. Your team is created instantly — you don’t need to invite any members to finish setting it up.
3
Invite members (optional)
You can invite members straight away, or skip this step and invite them later from the Team Members dashboard.
Renaming Your Team
Team Owners and Admins can rename the team at any time. Click your team name in the left-hand panel, open the Team settings tab, enter the new name (up to 50 characters) in the Team name field, and click Save.Accessing the Team Members Dashboard
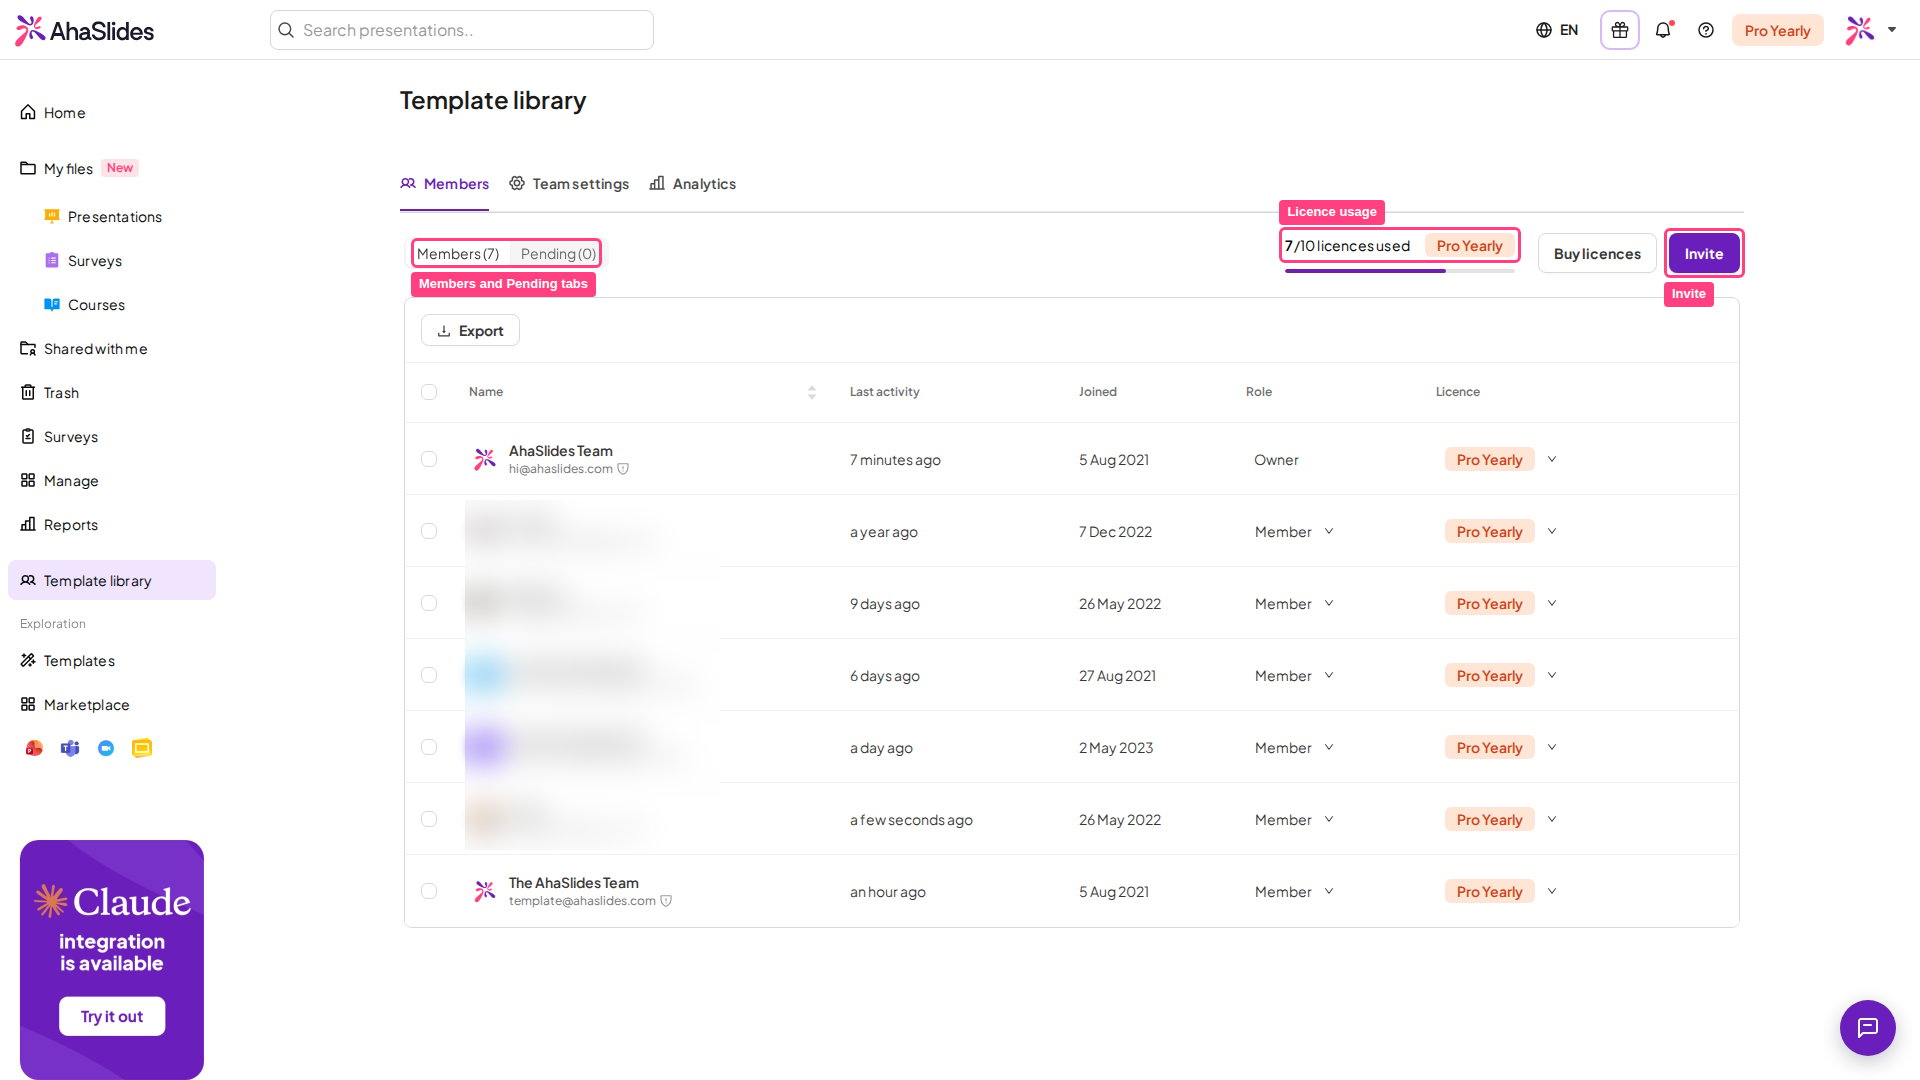
To manage your team members, click on your team name in the left-hand panel of the dashboard. The team members dashboard has two tabs:- Members — shows all current team members with their roles, last activity, join date, and (for paid plans) their licence status.
- Pending — shows all invitations you have sent out, including their current status (pending, accepted, declined, or expired).
Member Roles
Only the team Owner can invite new members as Admin. Admins can only invite new members with the Member role.
Inviting Team Members
To invite new members to your team, click the Invite button and enter their email addresses — you can invite multiple members at the same time. In the role dropdown next to the email field, select the role (Member or Admin) that each invitee will have in the team.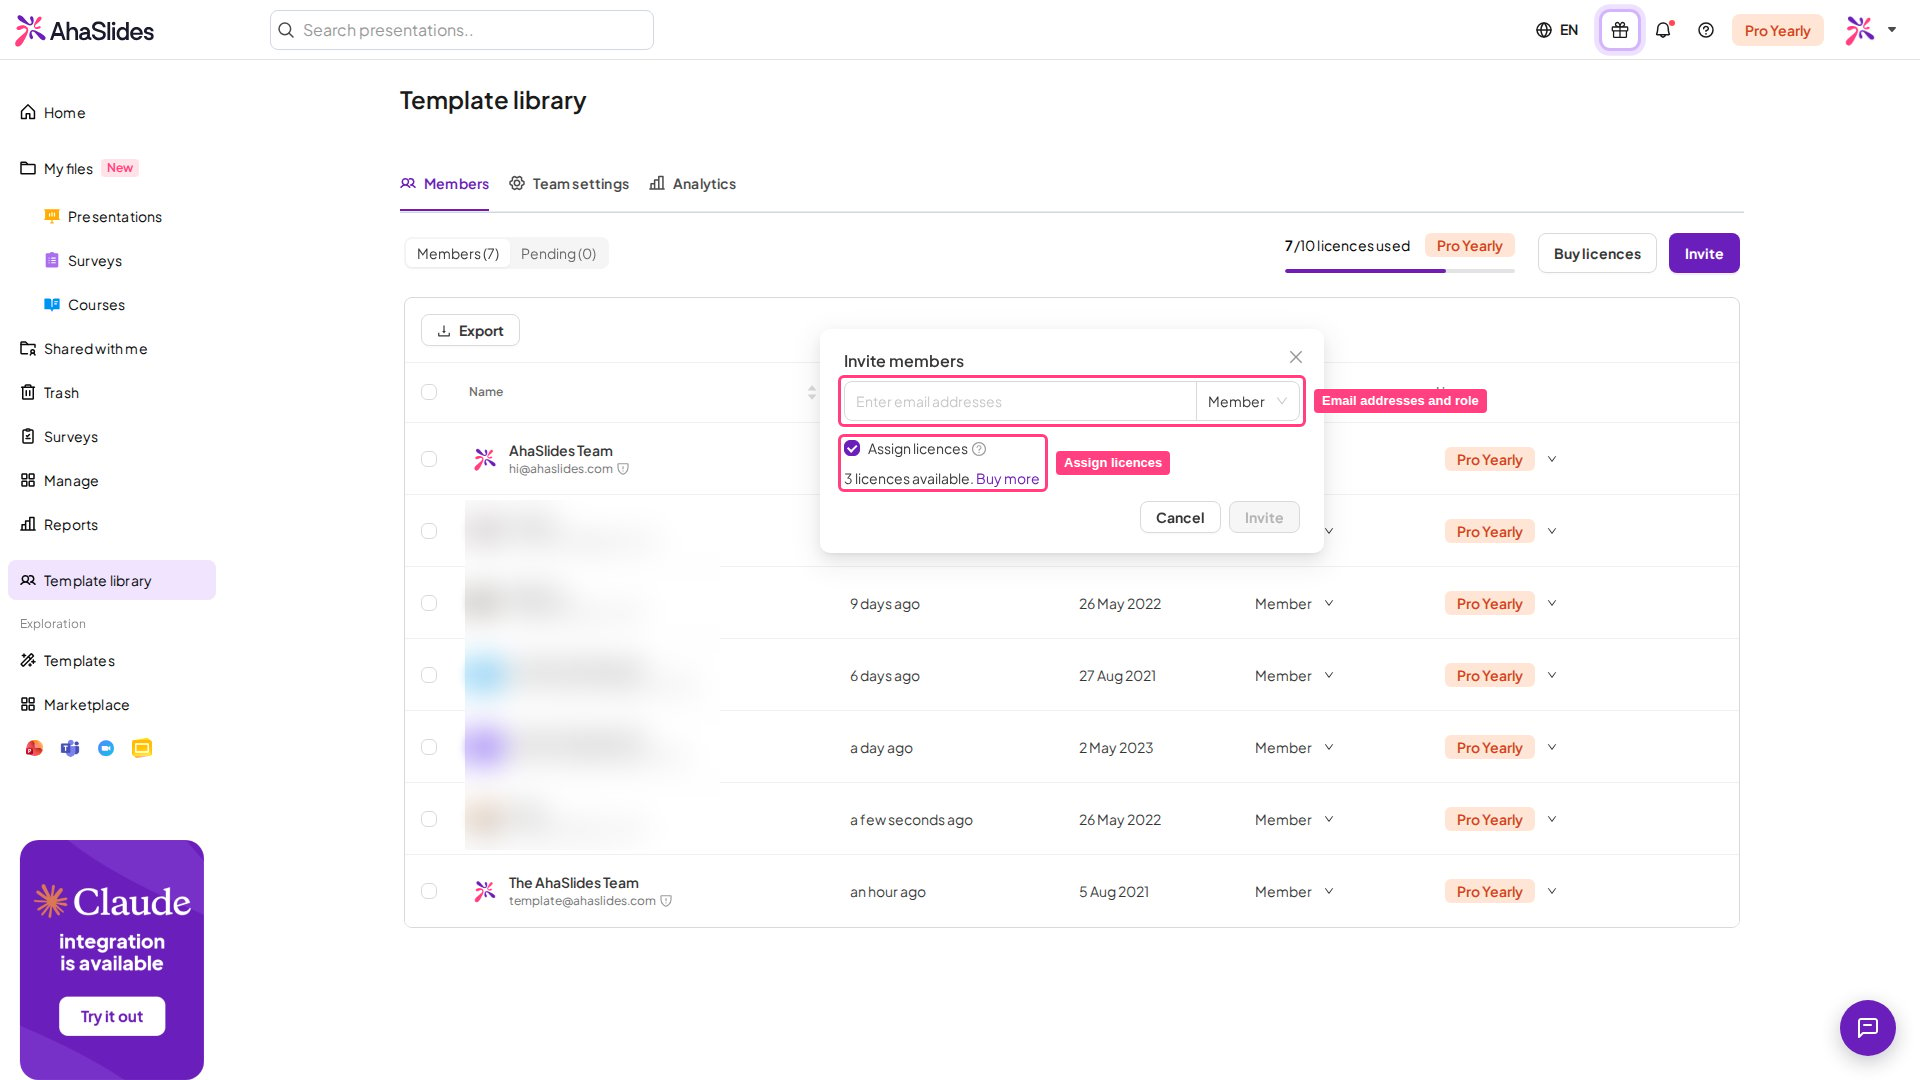
Accounts that are already a member of another team cannot be invited. They will need to leave their current team before they can accept your invitation.
- Assign licences checkbox — when checked, each invitee automatically receives a paid licence upon accepting. Enabled by default when seats are available; disabled when the team is at its quota. If more invitees accept than seats are available, licences are granted on a first-come-first-served basis.
- Available licence count — shows how many seats are free to assign.
- Buy more link (owners only) — takes the team owner to the licence purchase page.
- Copy the invitation link to share it directly.
- See an “Auto” badge (on paid plans) indicating a licence will be auto-assigned when the invitee accepts.
- Withdraw any pending invitation by clicking the withdraw icon on the right-hand side.
Managing Licences (Paid Plans Only)
On a paid Team plan, the Members tab includes a Licence column showing each member’s current licence status. The team owner and admins can grant or revoke licences for individual members using the dropdown in that column. Bulk licence management — Owners and Admins can also manage licences for multiple members at once: select one or more members using the checkboxes on the left side of the Members table, then use the Assign or Revoke action that appears in the action bar.Members who have their own active personal subscription are not eligible for bulk licence management — their plan is tied to their individual account rather than the team.
Changing Team Members’ Roles
As the Owner, you can change any team member’s role between Member and Admin. Navigate to their name on the Members tab, open the dropdown menu under Role, and select either Admin or Member.Only the team Owner can change member roles. Admins see member roles as read-only labels and cannot reassign them.
Removing Team Members
To remove a member from your team, navigate to their name on the Members tab, then click the Remove from team icon on the far right-hand side of their row.If you are using a Team plan, you regain 1 licence each time you remove a team member. That user’s account is automatically downgraded back to the Free plan.